SOLUTIONS / S-TYPE OPTICAL / RESOURCES
Sample loading process
SOLUTIONS / S-TYPE OPTICAL / RESOURCES
Sample loading process
How to attach the sample changer to the Sample Cage
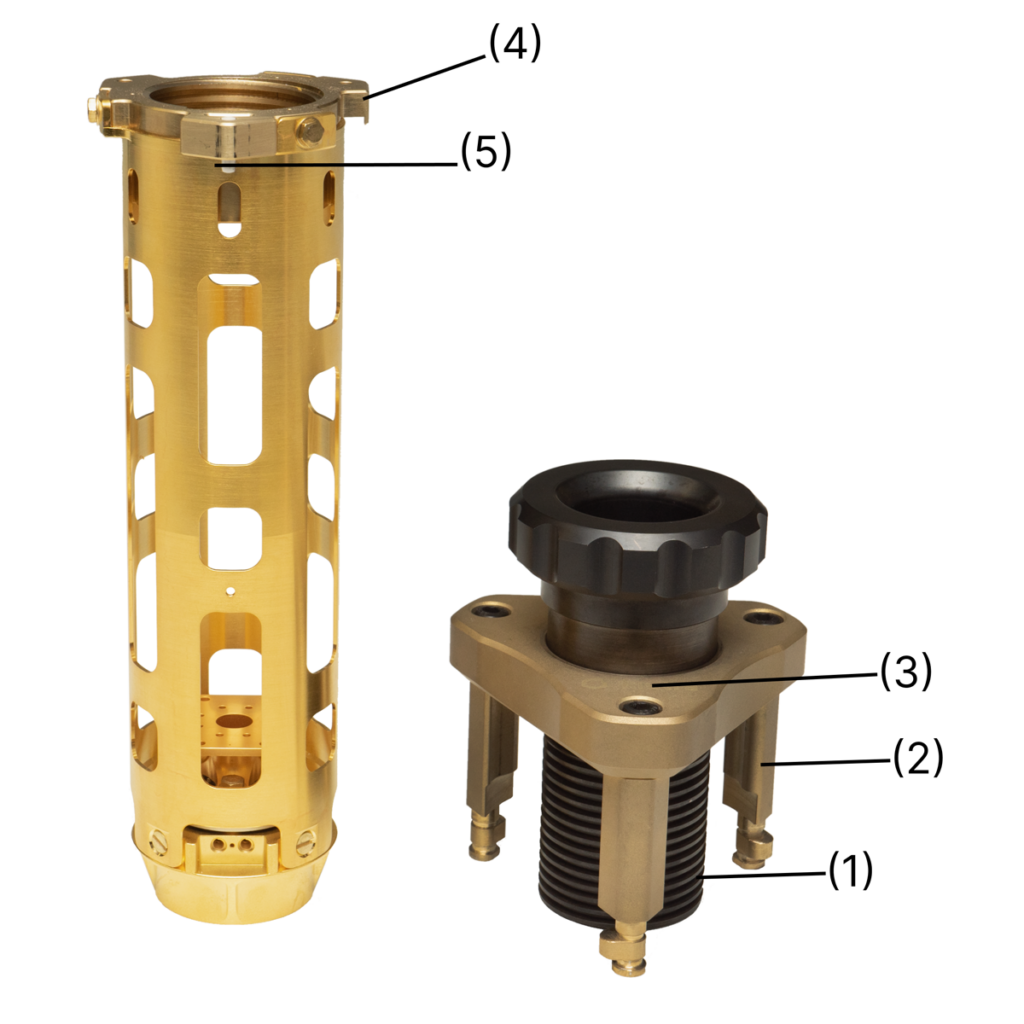
Sample Cage (left) & Sample Changer

Cage & Changer Assembled
Place the Sample Cage on top of the Puck Station and assemble the two modules by screwing the black screw inside the threaded brass part. After a few rotations, the outer feet (2) of the Sample Changer are stopped by the legs of the brass ring (4) of the Sample Cage.
Now it’s important to align the two parts correctly, so that the legs will stay in place. This can be verified by trying to rotate the sample cage after inserting the screw halfway in. The Cage and the Changer are assembled right, if the legs of the brass ring (4) are aligned and guided by the feet of the Changer (2)
If the alignment of both parts is correct, insert the screw further until the end stop. Loosen the screw a bit so the Sample Cage is not jamming inside of the Sample Changer.
Once the Sample Changer is mounted on the Sample Cage, both are inserted into the cryostat. There is a white ceramic pin mounted on the Sample Cage. This pin must be oriented facing the user. Although the orientation of the Sample Changer and Sample Cage is symmetrically designed in 120° steps, it is recommended to align the kiutra logo (3) together with the white pin (5) towards the front, as it gives a good indication of where the front is.